What Do You Want to Know About Candle Making?
A Guide to Preventing Common Candle Making Problems
The quest for a candle that burns well and that is easier to make is part of the art. Everyone has to experiment with different combinations of method and material because everyone uses differently formulated supplies. These materials react in different ways to produce varying results. Therefore there is no set formula or recipe for the craft except where you can ensure the consistency of your materials and method. Even the temperature of the room you are working in has its effects. From a hobbyist point of view, the unknown can be one of the most appealing things about candle making. The puzzle is not unsolvable, it just requires you to experiment to achieve the desired results (don't forget to record your experiments - you may want to achieve the same results again sometime). Throughout the process, even when we make big 'mistakes' eventually someone who visits fancies the same candle that we might consider a failure.
Paraffin wax will shrink and you will see wells form down your wicks as the candle cools. Often the best thing to do is simply keep some of the same batch of wax melted to refill the wells , sometimes several times over several hours. Be careful not to overfill if you want smooth candles. If wax gets between the hardened candle and its mould it will make a smooth surface imperfect.
There is a type of paraffin called 'one-pour' and it is formulated so that it doesn't shrink when it cools. It is a softer wax because it contains a blend of waxes which have higher oil content. This type of wax is good for container candles.
You can get better candles that don't shrink as much by adding some beeswax, and melt with the paraffin. Try a 1:4 ratio
beeswax to paraffin. With this also experiment with increasing the size of wick you use to get a candle that melts all the way
to the sides - not leaving an unmelted perimeter as it burns down the wick length.
Beeswax often requires a larger wick than a straight paraffin(no additives) candle.
You can also make paraffin candles that don't shrink as much by adding solidified vegetable oil like Crisco but this
sometimes causes some side effects like the one-pour paraffin.
Shrinkage will also be reduced by using a wax polymer additive such as Pourette's clear crystals or lustre crystals. You melt
these separately from the paraffin (they take high temps to melt) then mix them in with the melted paraffin and pour your
candles. They will increase the hardness of your candles so they may not be suitable for container candles. A candle that is
very hard will burn a hole straight down the wick leaving the sides of the candle unmelted. Polymers can change the opacity
of your wax, so check with the supplier to see if it will cause wax to become creamy looking or not.
Candles Are Difficult to Get Out of the Moulds
Because paraffin wax shrinks when it cools, most candles will come out of a mould with few problems. If you encounter
difficulties, spray the insides of your empty moulds with silicone spray. Some readers report a light coating of vegetable oil
works well as a substitute. Beeswax in particular is sticky and difficult to get out of moulds at times. For any candle,
regardless of the wax type, a stay in the refrigerator usually shrinks them slightly so they pop right out of the moulds. Watch
how long you leave them in the fridge, though. If they are in metal moulds, leave them in the cold just until the mould feels
cold. Longer and you may get thermal shock cracks... little spidery web type lines and cracks throughout your candle.
There is also a product called releasant which you melt into your wax before you pour, and doesn't effect the colour or
burning of your candle, but makes them release from the mould easily. Heat also works to get a candle out of a mould. Run
hot water over the mould, or put the mould in a low oven for a couple of minutes. The disadvantage with heat, is that when
the outer surface of the candle melts, it not only releases the candle from the mould, it gives the candle surface
imperfections, like drips. You may or may not like the look of this.
Container Candles Don't Melt Around the Edges
From a Reader.....
Hi Sharon,
I have been doing candles 6 months or so and have been doing very well in several shops. I was using a 136 Melt Point
wax with 10% petro and 1/2 % vybar. However I am getting tired of paying to have petro shipped and cannot get it locally
so decided to go back to the experimenting table. I though the lower the Melt Point, the softer the wax which I am assuming
is because of the oil content. However I did not realize that the lower the Melt Point, the longer the burn! Sounds stupid I'm
sure. So are you saying that a wax of 126F/52C MP will burn longer than a wax with a mp of 131F/55C ? If this is true then I am totally
dumbfounded. You see my thinking was that the harder the wax the longer the burn (because of the length of time it would
take to melt) yet I knew it had to be soft enough to burn across the container - therefore the petro. I also knew that the
softer the wax the more fragrant because the scent was able to escape better. Because I wanted a long burning candle, I
have been trying to stay in the lower 130's yet have the large melt pool. Please let me know if I have this correct now.
Thanks,
J.
The reply....
You've got it! The lower 130'sF 53-55 C should be fine for free standing candles. The key with the melt point of wax is what kind of
candle you are using it for. Low melt point wax will make a longer burning candle if you use it for a container candle. If you use
125 melt point in a free-standing or taper candle, it will just melt into a blob in no time. All this is connected to the size and
type of wick used too. If you have these three things in balance you get candles that burn well and look good : Type of
candle, Wick size and Melt Point of the wax. You are correct about the melt pool needing to be wide for container candles.
Since wax melts first, then evaporates (burns or whatever the correct chemical term is) container candles need to have a
good sized melt pool (hence, use the low melt point wax) to burn fully and properly. If there isn't enough of a melt pool, the
candle just burns down the wick in no time, leaving the sides of the container still covered in wax.
Tiny bubbles and pits forming on your candles are caused by several things. Try pouring the wax at a hotter temperature,
making sure the moulds are warm when you pour, and/or cooling your candles away from drafts. Sometimes bubbles form
when the wax is poured too cool, and it sets up before the bubbles have a chance to rise and dissipate. A water bath after a
hot pour generally results in very smooth, shiny surfaces. Remove the mould from the water bath after the first refill of the
sink hole, and finish cooling at room temperature. Also, pits and bubbles may form when there is water in your wax or in your
scent liquid. You may also have too much scent or the kind of scent that isn't made to blend with wax. Many pitting and
bubble problems can be solved by adding 1% vybar to your paraffin. This will make your colours a bit creamy or light, so
you may need to add more colour. Vybar does not affect the speed at which your candles burn.
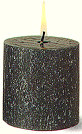
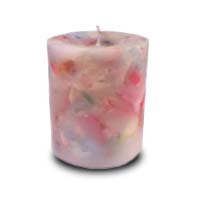
Mottling and Star Burst Patterns
These are caused by using fragrances that are not made to mix with paraffin, or using too much of the fragrance. The carrier
of the fragrance must mix with wax. Alcohol, water and many oils do not mix with wax. Check with your scent supplier to be
sure that it will mix with wax. When using the correct type of fragrance, also add 1% vybar mixed with your paraffin to
eliminate the mottling effect.. It allows the paraffin to hold more of your scent.
You can make mottled candles on purpose by adding 3 tablespoons of mineral oil to 1 lb of melted paraffin.
Wet Spots/Adhesion Problems in Container Candles
Q:
Do you have any suggestions about keeping the wax from pulling away from the sides of glass jars and creating very
unattractive spots/pits, etc.? I want to get a very smooth looking surface. Thanks for any help you might be able to offer.
A:
Try heating your jar just before you pour the wax into it. Get it hot, but not too hot to hold. Also, use vybar .... 1/4 tsp. per 1
lb of wax. Melt along with the paraffin. Use low melt-point wax (128-130 degrees F or 55 C) Pour the wax when its about
160 degrees fahrenheit. Cool the jars slowly, out of any drafts. If the room is cold, put the jars in a cardboard box to cool.
This should help the wax adhere to the jars better, and get rid of those air bubbles/or 'wet spots' as they are also called.
WEAK FLAME/DROWNING WICK
This problem is usually caused by using a wick that is too small, or by using wax that is too hard (too high melt point) for the
type of candle you are making. The first step to determine what the problem is and how to correct it, is to try using a larger
wick size. If that doesn't work, use lower melt point wax without hardening additives such as stearine, or any of the
polymers. Pure beeswax container candles often have this problem because beeswax has a naturally high melt point (146 F)
. Try adding low melt point paraffin at a ratio of 2:1 paraffin to beeswax.
Making A Strongly Scented Candle
Sometimes people have trouble with the scent 'throw' of their candles when they use too much vybar as a wax additive. It
binds up the scent oil molecules Also, if you are buying a paraffin blend, it may already have vybar added to it. Blends are
mostly called 'one pour' wax.
Make sure your candle forms a wide melt pool as it burns. To do this use the correct melt point wax, and wick size for the
type of candle you are making. More scent will be released by the melted wax before it is burned off by the flame.
Add your scent to the melted paraffin just before pouring, so it won't evaporate with a lot of cooking.
For container candles:
Use 125-130 degree fahrenheit (54 Celcius ) melt point paraffin (low melt point)
1/4 tsp. vybar 260 per 1 1b of wax, melted with the paraffin
a fat enough wick for your container
and your scent (added just before pouring the melted wax)
The vybar allows you to use more liquid scent than you are using presently. It binds up the molecules of scent oil so they
don't 'bleed' out of your finished candles in oily droplets or residue at the bottom of the candle.
Be aware that too much vybar will cause your candle to have a weak scent.
For free-standing candles, use the same formula except use 138 degree melt point wax.
The maximum amount of scent you can use depends on the scent formula. Some mfg make their scents stronger than others. Try adding more and more scent until you get a candle that comes out wrong: The problem you will see is mottling, starburst patterns in the wax, oily residue on the surfaces of the candles, pitting and sometimes sputtering wicks. This will tell you how much of that manufacturers scent the paraffin will hold. If its still not very fragrant, try another mfg scent.
Also, don't use too much vybar... it helps the paraffin to hold more oil, and colour but it also locks up scent if used liberally.
1/4 tsp. per 1 lb of wax should be enough for smooth good burning candles.
What Do You Want to Know About Candle Making?