
making the candles, pouring the wax 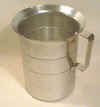
and removing candles from moulds:
Break up your wax block by putting it in a plastic bag, and whacking it with a hammer. You can also just prise chunks off the main block with an old knife. If have enough space, an axe works well too.
Melt your wax over a medium burner in the saucepan and pitcher "double boiler" set up described above. Or, try the deep fryer or crock pot, or turkey roaster to melt your wax as a correspondent suggests: "I find that using a fry daddy with adjustable heat to melt my wax works much better than the old double broiler. You just have to keep the heat very low until the wax starts to melt or the teflon coating bakes off. Once the wax goes into meltdown you just set the heat and your on your way. I then dip the wax with a plastic cup or punch ladle. I find this method much easier to control the temp of the wax, and once the power is off you just let the wax cool and it pops out in a block that fits back into the unit at a later date." For pouring wax into moulds the temperature of the melted wax should be between 85 and 95 degrees C (180 and 200 F) for blemish free candles. If you like interesting mottled patterns in your candles like I do, I don't bother taking the wax temperature. I just wait until it is fully melted and clear.
You can use 3 parts paraffin wax and one part block beeswax. This will not be clear when it is melted. This mixture is harder to get out of a mould because of the sticky properties of the beeswax. Use silicone spray in your mould to get easier releasing candles. You can also put the mould in the refrigerator after its mostly cooled, for half-hour to help with the releasing. The blend of beeswax/paraffin produces lovely honey coloured candles with a lovely beeswax aroma. Other benefits of a beeswax/paraffin mixture are smoother candles without cracks or web like patterns caused by thermal shock in the cooling process. Beeswax doesn't shrink nearly as much as paraffin, so you will notice smaller or no wells forming down the middle of your candle as it cools - this means less or no refilling as it cools.
Prepare your moulds and containers while the wax is melting. You can spray inside each plastic or metal mould with silicone spray available at candle making supply stores. I recommend doing so, the candles always release from the mould easily this way. You can also use vegetable oil to lightly coat the inside of your moulds. If your mould has a hole in the bottom, thread the wick through here and seal it on the outside with rubber putty. Stretch the wick to the open end of the mould and suspend it here wrapped around a rod or pencil or something similar.
If you are making candles that stay in the container, or if your mould cannot be perforated with a wick hole, you can wick them two different ways that I can think of. When using flat braid wicking, make sure the braid grain or nap is going from top to bottom on your candle for even burning. (v up) An upside down wick will develop a carbonized ball on it as it burns and that will smoke and cause the candle to burn unevenly, and faster without utilizing the wax of your candle efficiently.
Here's a tip from Staci for holding your wick straight and taut. Take a tounge depressor and slice it length wise about 1/2 way down and just slide the wick into it and rest it on top of the container.You just pull the wick nice and tight!
1. For a tall or medium container, dip the desired length of wick in melted wax for a moment. Remove and hold it taut while it dries and hardens for a minute. Now you have a nice stiff straight piece of wick. Fix a wick base or tab (those little round metal flat things with a hole in the middle) or just a flat piece of aluminium foil, to one end of your wick. Glue this to the bottom of your container with hot glue and let dry. Wrap the other end of the wick around a pencil or rod and suspend over the rim of the container. Fill your container with wax.
2. For a short container, just pour your wax in and let it harden. Later take a heated metal skewer or use a power drill
to make a hole through the centre of the candle for your wick. Insert your wick and you're done. You can pour a little
melted wax on top so it seeps down the hole and fixes the wick better if you need to. This method is useful if you're
using Jell-O moulds or cake moulds, where the bottom is the top of the candle, and you don't want a wick tab on the
top of your candle and you don't want to put a hole in your mould for a wick.
Pouring the wax.
When your moulds and containers are ready, and your wax is melted, add the colour chips to your melting pitcher and melt fully into the wax. Then, at the last add your scent. The scent is added at the last so it doesn't denature or dissipate through too much heating for too long. Now you can pour your candles. If you're aiming for a very smooth surfaced candle, it helps to have the mould warmed and tilt the mould so the wax doesn't fill the mould so turbulently, and cause tiny air bubbles to form on the sides and surface of your candles. Save some wax to refill the candles as they cool. I keep wax in a melted state for hours because as the candles cool the wax in the moulds and containers contract and form a deep well right down the middle of your candle. Refilling this well may be necessary several times. If you have beeswax mixed in with your paraffin, the shrink well will not be as big, or need refilling as much. Be careful not to let your refill wax run over the top of the original candle level. The refill wax will run over and seep down inside between the candle and the mould and will mar your surface if you're going for perfect smoothness. It also makes it difficult to get a candle out of the mould.
Moulded candles can be made to look very even and shiny by cooling them while still in the mould in a cold water bath. About 1 minute after you pour, take the entire mould and set it in a container of cold water. Be careful not to get any water in your wax. It will ruin a candle. You will likely need to weight your mould so it doesn't float or tip in the water bath. Let the mould sit in its water bath after its second refill for about 2 hours. The final cooling process takes place at room temperature. It will take about 8 hours depending on the size of the mould for the candle to cool completely and be ready to remove from the mould. You can speed this final cooling process by putting candles in the refrigerator. Sometimes they will develop lines and tiny 'thermal shock' cracks which can be quite attractive. Remove the mould from the refrigerator after it feels cold to the touch. Any more cooling will result in many lines and tiny cracks, which means your candle surfaces will flake off later. If you desire this effect, you can put the cooling mould in the freezer for a half hour
Remove the candles from the moulds.
If your finished candle has seams in it, you can gently remove them with a knife. Flatten the base of a wobbly candle by
rubbing it gently around inside a warm fry pan until it melts flat. Polish finished candles with nylon stockings to remove
fingerprints and small scratches. To get a hard shiny protective surface on a candle apply liquid candle sheen with a soft
cloth. It is available at candle making supply stores and it works great! A spray version is also available. Others have used
no-wax acrylic floor polish with good results. Floor wax has an odor, but readers report that the smell goes away when the
wax hardens.